Key Lime Pie Bars
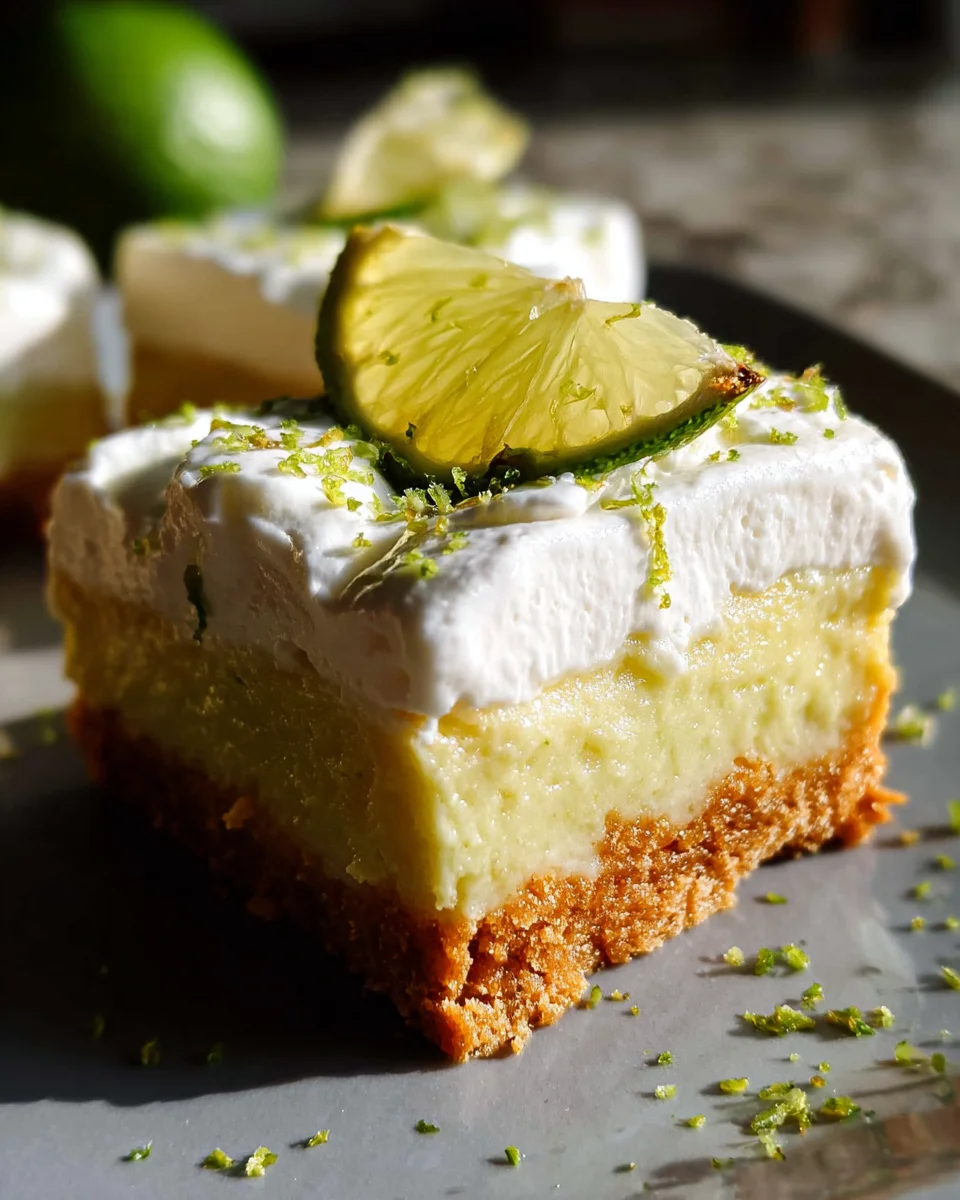
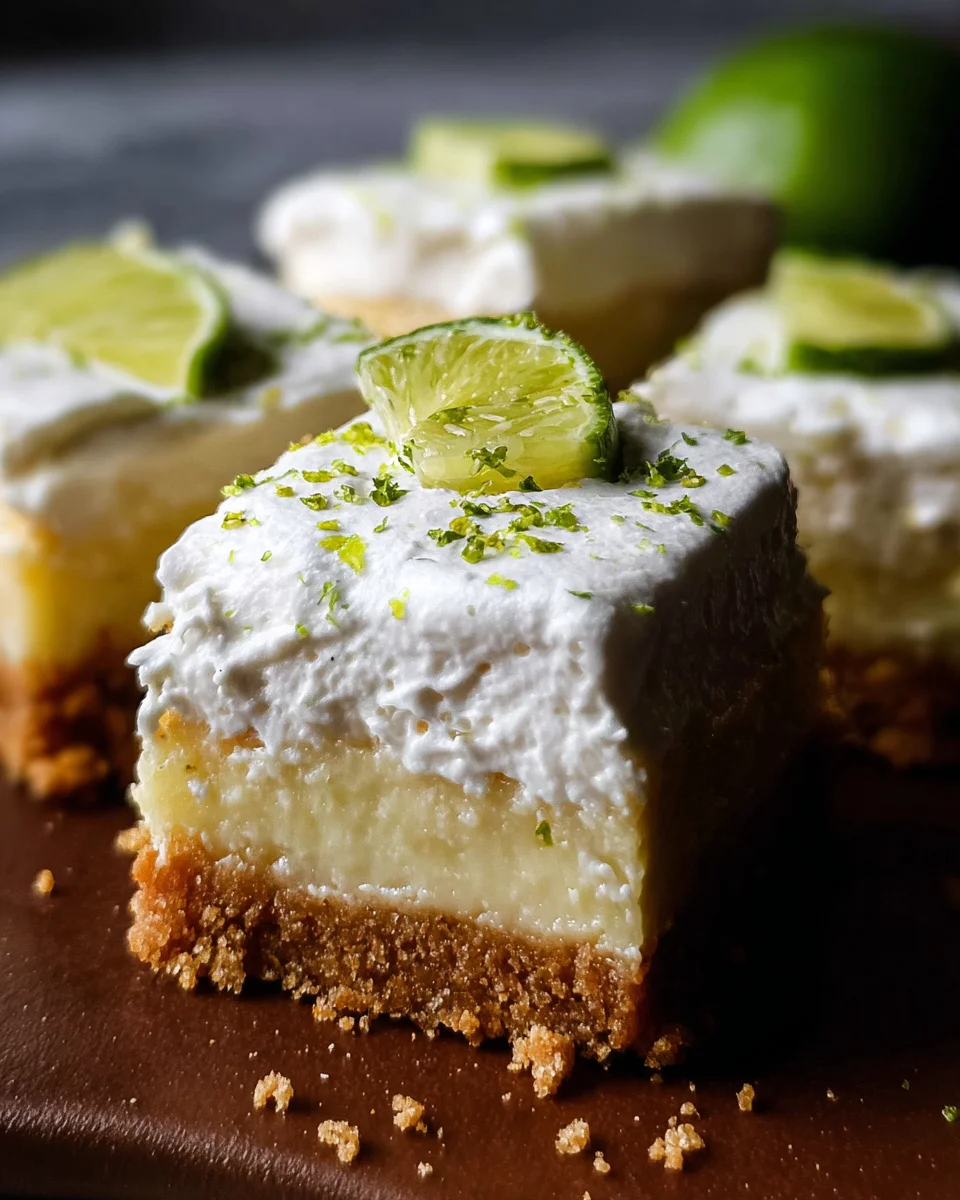
These Key Lime Pie Bars are the perfect blend of tartness and sweetness, making them a delightful treat for any occasion. Whether you’re hosting a summer BBQ, enjoying a family gathering, or simply satisfying your sweet tooth, these bars stand out. Their creamy filling with a refreshing lime flavor is complemented by a crunchy crust, making them irresistible. Plus, they are easy to prepare and can be made ahead of time for convenience!
Why You’ll Love This Recipe
- Easy to Make: With just a few simple steps, you can whip up these bars in no time.
- Refreshing Flavor: The combination of key lime juice and zest delivers a bright, tangy taste that’s perfect for hot days.
- Versatile Dessert: Great for parties, picnics, or as a simple weeknight treat.
- No-Bake Option: Serve chilled for an even more refreshing experience during the summer.
- Crowd-Pleaser: These bars are sure to impress family and friends with their deliciousness.
Tools and Preparation
Before diving into the recipe, gather your tools and equipment to ensure a smooth baking process.
Essential Tools and Equipment
- 9×13-inch baking pan
- Mixing bowls
- Whisk
- Electric mixer (or hand whisk)
- Zester or grater
Importance of Each Tool
- 9×13-inch baking pan: Perfect size for creating even bars that are easy to cut and serve.
- Electric mixer: Makes it easier to achieve a smooth filling without lumps.
Ingredients
These perfectly tart and tangy key lime pie bars are a breeze to make and are delicious served straight from the fridge on a hot summer day!
For the Crust
- 2 cups vanilla wafer cookies, finely ground (250 g)
- 5 tablespoons unsalted butter, melted
- 2 tablespoons light brown sugar
For the Filling
- 1 tablespoon lime zest, packed (6-7 key limes)
- 5 large egg yolks
- 22 ounces sweetened condensed milk (1 14-ounce can and ¾ cup from 2nd can)
- 1 cup freshly squeezed lime juice
For the Topping
- 1 cup heavy whipping cream
- 2 tablespoons powdered sugar
How to Make Key Lime Pie Bars
Step 1: Prepare the Crust
- Preheat your oven to 350°F (175°C).
- In a mixing bowl, combine the finely ground vanilla wafer cookies, melted butter, and light brown sugar.
- Press this mixture evenly into the bottom of your greased 9×13-inch baking pan.
- Bake for 10 minutes until set. Remove from oven and let cool while you prepare the filling.
Step 2: Make the Filling
- In another bowl, whisk together the egg yolks until smooth.
- Gradually mix in the sweetened condensed milk until well combined.
- Add in the freshly squeezed lime juice and lime zest; mix until smooth.
- Pour this filling over the cooled crust.
Step 3: Bake Again
- Return the pan to the oven and bake for an additional 15-20 minutes or until set but still slightly jiggly in the center.
- Remove from oven and let cool at room temperature before refrigerating for at least two hours.
Step 4: Prepare the Topping
- In a mixing bowl, whip heavy cream with powdered sugar until soft peaks form.
- Spread this whipped cream over chilled key lime pie bars before serving.
Step 5: Serve
- Cut into squares once chilled completely.
- Enjoy your refreshing Key Lime Pie Bars!
How to Serve Key Lime Pie Bars
These key lime pie bars are not only refreshing but also versatile in how you can serve them. Whether for a summer gathering or a cozy family dinner, these bars can be enjoyed in various delightful ways.
Chill and Enjoy
- Serve straight from the fridge for a cool treat on hot days.
Garnish with Whipped Cream
- Top each square with a dollop of whipped cream for added creaminess.
Add Fresh Fruit
- Pair with slices of fresh fruit, like strawberries or blueberries, to enhance the flavor.
Serve with Ice Cream
- A scoop of vanilla ice cream complements the tartness of the key lime perfectly.
Create a Dessert Platter
- Arrange the bars alongside other desserts to create an impressive dessert spread.
How to Perfect Key Lime Pie Bars
Perfecting your key lime pie bars is key to achieving that ideal balance of tartness and sweetness. Here are some tips to ensure your bars turn out perfectly every time.
-
Use Fresh Limes: Freshly squeezed lime juice will provide the best flavor compared to bottled juice.
-
Chill Thoroughly: Allow the bars to cool completely in the fridge before cutting. This helps them set properly.
-
Don’t Overmix: When combining ingredients, mix just until combined. Overmixing can affect the texture.
-
Check for Doneness: The filling should be set but still jiggle slightly when you take it out of the oven.
Best Side Dishes for Key Lime Pie Bars
These key lime pie bars pair wonderfully with a variety of side dishes that complement their tangy flavor. Here are some excellent options:
-
Fresh Fruit Salad: A mix of seasonal fruits adds color and freshness to your dessert table.
-
Coconut Macaroons: These sweet treats enhance the tropical vibe and offer a chewy contrast.
-
Grilled Pineapple: The caramelized sweetness from grilling brings out natural flavors that pair well with lime.
-
Strawberry Shortcake: This classic dessert provides a sweet balance against the tartness of the bars.
-
Cheesecake Bites: Bite-sized cheesecake can be a rich yet delightful addition to your dessert offerings.
-
Chocolate-Dipped Pretzels: The salty crunch of pretzels dipped in chocolate creates a fun contrast to the creamy bars.
Common Mistakes to Avoid
Making key lime pie bars can be simple, but common mistakes can ruin the experience. Here are some tips to help you avoid them.
- Using regular limes: Always opt for key limes when preparing key lime pie bars. They provide the unique tartness that defines this dessert.
- Not measuring ingredients accurately: Precision is essential. Use a kitchen scale or measuring cups to ensure you get the right amounts for a perfect texture.
- Skipping the chilling time: It may be tempting to cut into your bars right away, but allowing them to chill enhances their flavor and sets the texture properly.
- Overbaking the filling: Keep an eye on your baking time. Overcooking can lead to a rubbery texture; you want it just set in the center.
- Neglecting to whip the cream properly: Properly whipped cream is crucial for topping. Whip until stiff peaks form, but don’t overbeat or it can turn grainy.
Storage & Reheating Instructions
Refrigerator Storage
- Store leftover key lime pie bars in an airtight container.
- They will last up to one week in the fridge.
- For best results, place parchment paper between layers if stacking.
Freezing Key Lime Pie Bars
- Wrap each bar individually in plastic wrap before placing them in a freezer-safe container.
- They can be frozen for up to three months.
- Thaw in the refrigerator overnight before serving.
Reheating Key Lime Pie Bars
- Oven: Preheat your oven to 350°F (175°C). Place bars on a baking sheet for about 5-10 minutes until warmed through.
- Microwave: Heat individual bars on a microwave-safe plate for about 10-15 seconds, ensuring not to overheat.
- Stovetop: Use a non-stick skillet over low heat. Warm each bar for about 2-3 minutes, flipping halfway through.
Frequently Asked Questions
These key lime pie bars are sure to generate some questions! Here are answers to common inquiries.
What makes Key Lime Pie Bars different from regular key lime pie?
Key lime pie bars have a firmer crust and are easier to serve in squares, making them perfect for gatherings. They maintain that classic tart flavor without the fuss of slicing pie.
Can I use bottled lime juice instead of fresh?
While using bottled lime juice is convenient, fresh-squeezed juice enhances the flavor significantly. Fresh limes give your key lime pie bars that authentic taste.
How do I make gluten-free Key Lime Pie Bars?
You can substitute vanilla wafer cookies with gluten-free alternatives like almond flour or gluten-free graham crackers while keeping all other ingredients unchanged.
Can I customize my Key Lime Pie Bars?
Absolutely! Feel free to add toppings like toasted coconut, fruit slices, or even chocolate drizzle for extra flavor and flair.
Final Thoughts
These key lime pie bars are not only refreshing but also versatile and easy to make! Perfect for summer gatherings or as an everyday treat, they can be customized with various toppings or crusts. Don’t hesitate—try making this delightful dessert today!
Key Lime Pie Bars
- Total Time: 50 minutes
- Yield: Approximately 12 servings 1x
Description
Indulge in the delightful experience of Key Lime Pie Bars, where every bite combines the perfect balance of tangy freshness and creamy sweetness. These bars are a summer staple, ideal for gatherings or simply enjoying at home. The zesty lime filling sits atop a crunchy vanilla wafer crust, creating an irresistible treat that is both refreshing and satisfying. Plus, with their easy preparation and no-bake options, you can whip them up in no time. Serve chilled, topped with fluffy whipped cream for an extra touch of decadence that will leave your guests raving.
Ingredients
- 2 cups vanilla wafer cookies (finely ground)
- 5 tablespoons unsalted butter (melted)
- 2 tablespoons light brown sugar
- 1 tablespoon lime zest
- 5 large egg yolks
- 22 ounces sweetened condensed milk
- 1 cup freshly squeezed lime juice
- 1 cup heavy whipping cream
- 2 tablespoons powdered sugar
Instructions
- Preheat oven to 350°F (175°C). Mix ground vanilla wafers, melted butter, and brown sugar; press into a greased 9×13-inch pan. Bake for 10 minutes and cool.
- Whisk egg yolks until smooth; gradually mix in condensed milk, then add lime juice and zest. Pour over cooled crust.
- Bake for an additional 15-20 minutes until set but slightly jiggly in the center. Cool at room temperature before refrigerating for at least two hours.
- Whip heavy cream with powdered sugar until soft peaks form; spread over chilled bars before serving.
- Cut into squares and enjoy!
- Prep Time: 20 minutes
- Cook Time: 30 minutes
- Category: Dessert
- Method: Baking
- Cuisine: American
Nutrition
- Serving Size: 1 square
- Calories: 220
- Sugar: 18g
- Sodium: 75mg
- Fat: 12g
- Saturated Fat: 7g
- Unsaturated Fat: 4g
- Trans Fat: 0g
- Carbohydrates: 23g
- Fiber: 0g
- Protein: 3g
- Cholesterol: 90mg

